In the Previous article i have explain stepwise to Configure User and Device Discovery to integrate Active Directory with MECM server with reasons and explanations. In the Article you will be learning another step in MECM server how and what are the method to create boundary and boundary group. As per the Best practice i will be explaining how assign boundary and boundary group.
Boundary and Boundary group are required for Assigning site, client discovery and management as we as delivery of content. Boundaries are location of the network from where client devices will be discovered and boundary group is the group of the boundaries logically defined.
Boundary
this identify the device locations and detect the the computers from its location. MECM server requires boundaries to understand, which MECM site the computer belongs to to manage it. Without assigning boundary, computer remains unassigned and unmanaged.
Boundaries can be using IP range, Network subnet and AD site. in this example will be configuring best way to create boundary which recommended by Microsoft as well. Here I shall using IP subnet to define the boundary for the computers. Here in this example i have only one network which need to be defined. If you have multiple network in you environment, Define all the networks in the boundary.
Once all devices assigned to boundary this help on multiple way to client. this helps identify, Distribution Point, State migration and Software update Point.
Boundary Group
Boundary Groups are required for linking boundaries to site systems and this decides which boundary group a device belongs to and download the contents from.
To create Boundary Open Configuration Manager Console -> Administration -> Overview -> Hierarchy Configuration -> Boundaries -> Right Click on Boundaries and Create Boundary.

As we are creating boundary based on IP subnet, we will be choose IP subnet on Boundary type. Provide the network and subnet mask also provide a understandable description name which use for identify the network. click on Apply and OK.

Boundary has been created base in network subnet. details can be read.

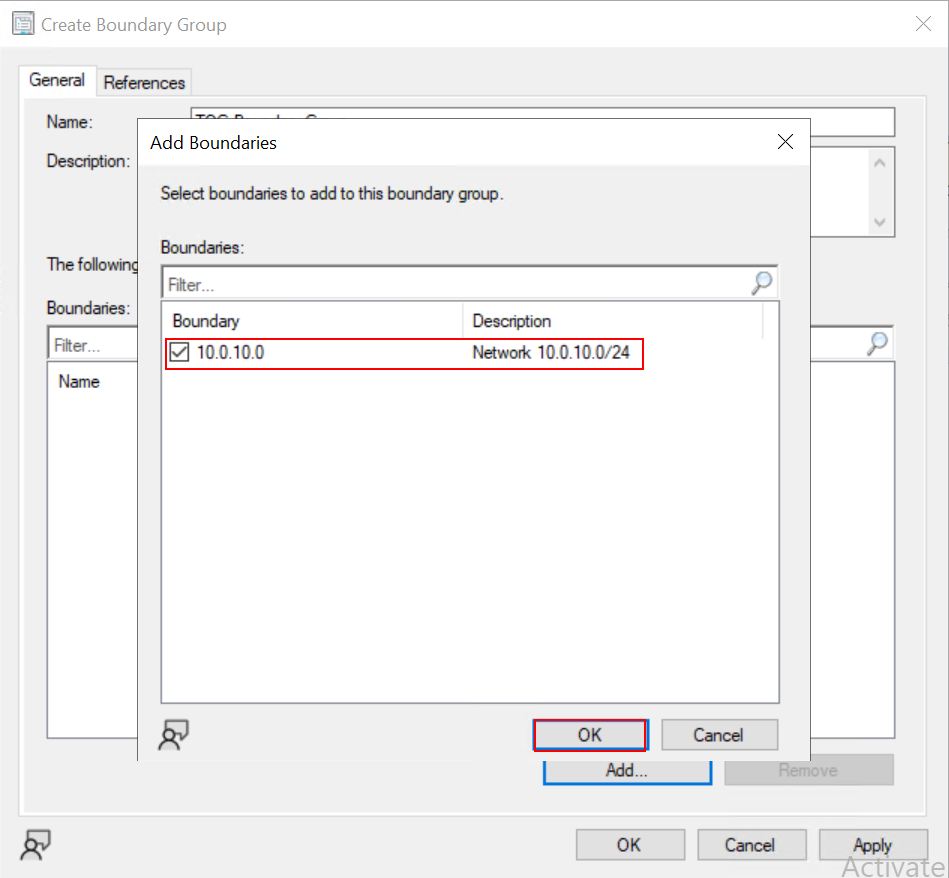
Now, its time to create boundary group, Open the management console -> Administration -> Overview -> Hierarchy configuration -> Boundary group -> Right click on Boundary group and Create Boundary Group.
Provide an Appropriate Name for the it and click on Add to add the boundary which we have create in previous step.
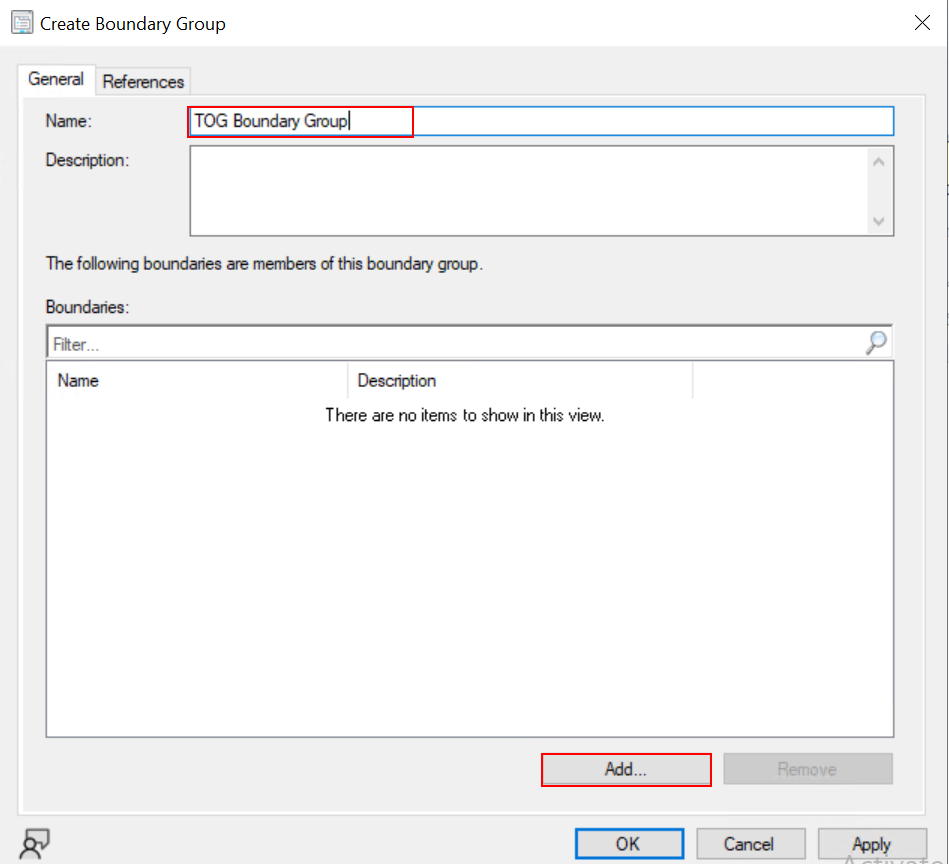
Select the Boundary which we have create in previous step base in IP subnet. and OK
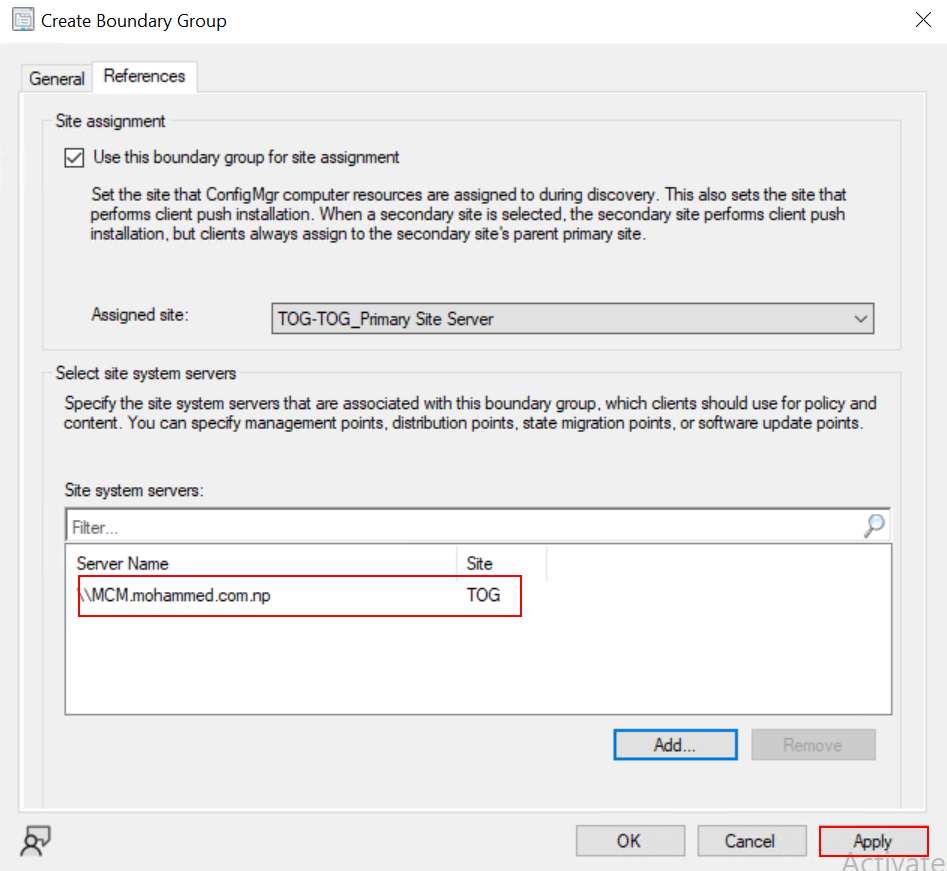
switch table to References Page, and enable “Use this boundary group for site assignment” also make sure You site name is select on Assigned site as shown in the figure below. Click on Add button to select the Site System for the client from where they takes policy and other required details.

Here we have only one Site System (TOG) check mark the FQDN of the server and click on Add Button.

In this example we have configured Site System for the Boundary group and network we have configured will use using this Site system for the policy and find distribution point to get software updates and application deployment including other things.
Click on Apply and OK
As you can see Boundary Group has been configured for the site TOG and slowly all the clients will start communicating to this site for the policy and discovery.

That’s it.
Conclusion!
In this article have explained reason, need of Boundary and Boundary Group and step by step configuration process. by following this article user will be able to configure these things in their environment as well whether in production or lab setup. In the next article i will be explaining step by step to configure and Push Microsoft Configuration Management Clients on endpoints to manage all the endpoint centrally.